
Can K-cups Be Added to Regular Coffee Makers?
Would you be able to utilize K cups in a regular espresso producer? This article will investigate this inquiry and attempt to respond to it in the ideal way conceivable.
Tragically you can’t utilize K cups in ordinary espresso machines. Keurig Machines utilize K cups through different machine use units. Anyway, there are explicit machines that can utilize the K cup. Here are a few models that can utilize K cups:
Slowly Single Serve Coffee Maker

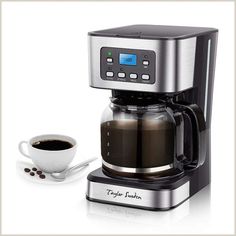
Cuisinart SS-10P1
- K-Cup viable brewer makes each cup, in turn, Compatible with any brand…
- Five refreshment sizes: 4-12 oz, Removable 72-ounce water supply, Charcoal…
- The boiling water button allows you to appreciate the moment espresso, soup, tea, and hot cocoa;...
Starbucks Verismo System
- The Starbucks Verismo Home Brewer brews your beloved superior grade…
- Create an unending assortment of your cherished Starbucks Cafe drinks right at…
- Swiss-designed, double strain innovation pulls remarkable coffee shots…
Substance show
Would you open K cups and use them in a customary espresso producer?
It is conceivable to utilize K cups with an ordinary espresso creator. On a basic level, all required is boiling water and something to channel the espresso with.
This is an instrument that is in most espresso producers. You should open up the K cup and dump the substance into the espresso channel for everything to fall into place.
Add sufficient water to make a solitary mug of espresso, then, at that point, blend as typical. Others have proceeded to utilize an ordinary filter and poured water over the removed substance of the K cup.
How the K cups are little holders that contain espresso inside them. They come fixed with a foil cover to keep the espresso new and dry consistently.
You can observe practically any kind of espresso in those flavor-filled cups. They are made from solid adaptable plastic. Inside there is a permeable channel that permits the espresso to be separated.
Place you need to close the highest point of the espresso creator. Two pins punch holes into the k cup when you have done this.
This happens with the goal that the heated water can blend the espresso, tea, or hot cocoa inside while pleasantly dispersing it. One opening is made in the foil cover on the top to give water access.
The other opening is made at the base to permit the newly prepared hot drink to dribble into your cup.
Step by step instructions to utilize a K-cup with no machine by any means

I, in all actuality, do have a touch of uplifting news. There is a hack by which you can utilize the K-cup without compromising the nature of your blended espresso. We will go through the cycle in a couple of simple tasks.
Be ready to invest more energy than you would when utilizing the Keurig. This is a manual cycle, so that it will require some additional persistence. First and foremost, you want to ensure you have the accompanying things prepared:
- Network sifter
- Electric Jug
- Estimating Cup
- Mug
- Scissors
Your initial step is guaranteeing you have bubbled water in your electric container. You take your K cup and cut out the base from that point. You need to ensure you try not to cut the channel as you open the lower part of the K-cup.
You can hold your K-cup up to the light to see the blueprint of the channel. Use your scissors to remove the base. After this progression, you continue to open the highest point of the k-cup by cutting the foil layer seal. You can punch a hole then, at that point, make a decent cut to remove the foil flawlessly.
Continuously be wary of trying not to spill the ground espresso onto the kitchen counter or floor. The following stage is putting the lattice sifter in the mug. You might need to wash it first before doing as such.
You can observe such a cross-section at the Dollar Tree. There are various types, so your most ideal decision is one that fits impeccably into your mug. You then, at that point, place the K – cup inside the cross-section with the end goal that it sits pleasantly and holds while you pour.
The accompanying advance is pouring sufficient high temp water to top off a mug into your estimating cup. You then, at that point, empty the water into the K-cup gradually, ensuring it doesn’t pour out.
The pouring may take longer than a couple of moments since the water pressure isn’t so much as the machine produces.
It will take you around one and a half to two minutes to purge the water from the estimating cup. The channel and the low tension of the water both add to the gradualness of the cycle.
A while later, some espresso is prepared, and it is practically similarly on a par with the one from the brewer. You can proceed to add sugars and milk. Presto! You just made your espresso.
Most Popular Posts


Hey There! I am Agnes a Fitness Fanatic, Mom of two Amazing Daughters and a Kitchen and Cooking Enthusiast. I love blogging about Kitchen Upgrades, Appliances, and Cooking Tips, and this Blog aims to help you make wiser choices when it comes to your kitchen. Feel free to contact me if you need help!!!!!!