How to melt milk chocolate?

It’s easy enough to buy pre-made chocolates, chocolate syrup, or even chocolate frosting at the store, but sometimes you want to get creative and melt your own chocolate for special recipes.
Most people use baking chocolate in their cooking, which can be quite bitter on its own. The popular commercial solution is to add milk and sugar, so why not do it yourself.
Can milk chocolate be melted?
Yes, you can melt milk chocolate. Although it’s not the best way to melt chocolate, you can make it work.
In this article, we’ll guide you step by step through the process of how to melt milk chocolate, both on the stove and in the microwave.
There are also some important tips for melting chocolate throughout the article, so it’s a good idea to read it all.
How to melt chocolate
There are many ways to melt chocolate, and the results will vary depending on the technique you use. If you expect concrete results, there are specific tips that can help you:
- Speed : Melts chocolate faster starting with small pieces, chunks or chips.
- Smoothness : Use an additional liquid such as milk, water, or even liquor.
- Tempering : Patience and know-how are really all it takes to properly temper chocolate.
The best way to melt chocolate
There is honestly no “best” way to melt chocolate. Some confectioners swear that the double boiler is the only way to get the perfect melted chocolate, while others believe that the microwave is not only faster, but also melts better.
The best way is the one that works for you and your recipe. Melting chocolate depends more on the quality of the ingredients than on the process.
We’ve devoted an entire related article to helping you choose the best chocolate to melt if you need a little extra guidance in that regard.
The only exception to this statement is that chocolate will always melt better if it is in small pieces before you start to melt it.
It’s also easier to melt chocolate without liquids, although if you want to use milk to melt your chocolate, it’s certainly possible with the right strategy.
How to melt milk chocolate
Melting milk chocolate usually speeds up the melting process and makes your chocolate richer and creamier, as well as having a lighter taste. However, it can be difficult and requires some skill to get right.
The first secret to melting chocolate with milk, or any other liquid, is to make sure you use enough chocolate.
If you only use a small amount of liquid, the chocolate will “seize up.” Seized chocolate solidifies almost instantly into a crumbly, brittle, boring and frustrating mess. What a waste!
You also have to make sure that you combine the milk and chocolate in the correct order and at the right temperature so that the chocolate melts properly.
Melting milk chocolate, step by step
If you want your melted chocolate to stay liquid and fluid long enough to use as a coating or dip, follow our simple 3-step process for great results every time:
Step 1: Prepare the chocolate for melting
To melt milk chocolate, you want to start with small pieces of chocolate that melt easily and consistently.
You can use chocolate chunks or wafers designed to melt quickly, or you can use finely chopped baking chocolate.
Step 2: Measure and heat the milk to melt the chocolate
Once the chocolate is ready to melt, measure out the appropriate amount of milk for the amount of chocolate you are melting. Remember that if you don’t use enough milk, the chocolate will react to the liquid and end up lumpy and thick.
- Most chocolates : Use 1 tablespoon of milk (or liquid) for every 2 ounces of chocolate
- Dark Chocolate : May require more liquid, so have some ready for an emergency.
You should also heat the milk before adding it to the chocolate to melt it. Adding cold liquid to hot or warm chocolate can cause it to seize. You must be careful to avoid temperature fluctuations when melting the chocolate.
For most melted chocolate, lukewarm milk is sufficient, which can be achieved by simmering in a saucepan over medium heat or in the microwave.
Some special recipes, like ganache, will tell you to pour boiling liquid (usually water) over the chocolate, so in those cases you’ll need to follow the recipe to the letter.
Step 3: Melt the milk chocolate in a bain-marie
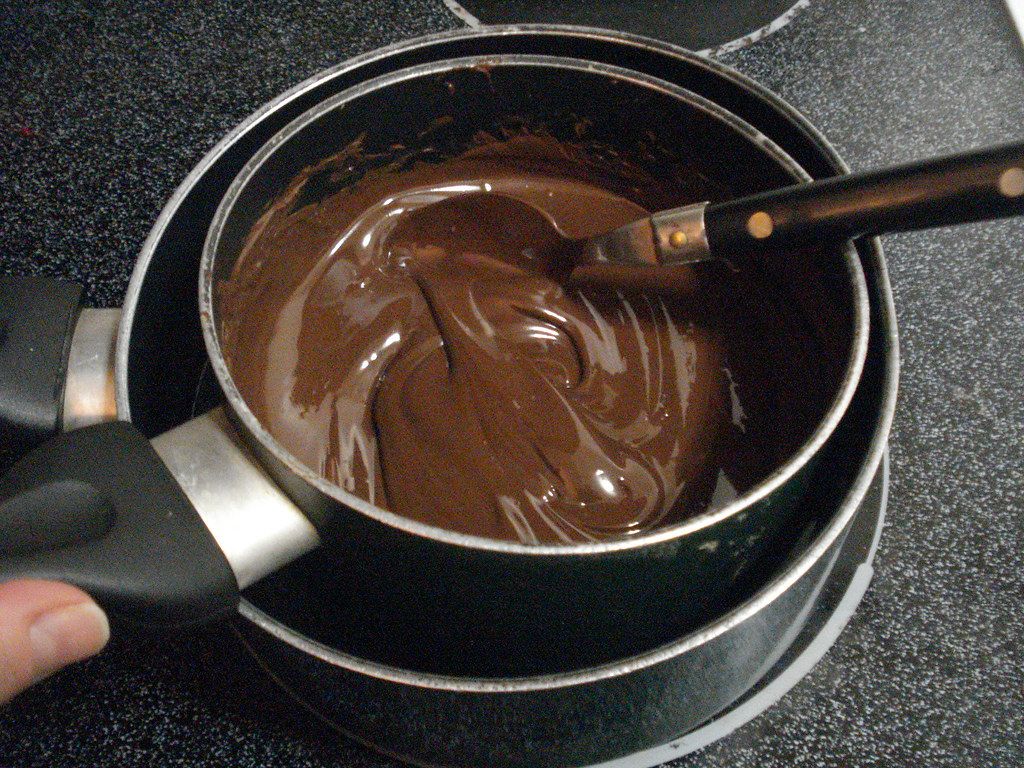
The most efficient way to melt milk chocolate is by using a double boiler.
If you don’t have one, you can improvise a double boiler by placing a glass or heatproof bowl inside a saucepan or pot, so that it doesn’t touch the water, but instead rests on the sides of the pot.
- Fill the bottom pot with water and bring it to a boil. Reduce the heat to low and place the upper pot or bowl over the steaming, boiling water.
- Heat the milk or add the hot milk first.
- Add the chocolate chunks to the hot milk and stir to combine with a rubber spatula.
When the chocolate is melted, remove it from the heat immediately. Melted chocolate can easily overheat, and that will ruin it faster than reheating it if/when it starts to solidify.
How to melt chocolate in the microwave with milk
Melting chocolate in the microwave can be faster than using a double boiler, but it also requires more patience in some ways.
However, you can’t just microwave chocolate on full power and expect it to melt smooth and perfectly, especially if milk is involved.
For best results, follow these steps to melt milk chocolate in the microwave:
- Start by heating the milk in a microwave-safe bowl large enough to easily fit the milk and chocolate.
- When the milk is simmering, add the chocolate chunks, wafers, or chunks and stir well.
- Microwave again for 30 seconds, then stir well, making sure to scrape down the sides of the bowl with your silicone spatula.
- Repeat the heating process in 30-second intervals, stirring in between until the chocolate is almost completely melted, but not quite.
- Stop heating, but keep stirring until all of the chocolate is smooth and melted, using the current heat to finish the melting process rather than risk overheating.
Tips for heating chocolate in the microwave
Microwaving chocolate is a quick and easy way to get the runny results you dream of. It’s not difficult, but there are some tips and techniques that can help you always get the best possible results.
Here are our top recommendations for melting chocolate in the microwave:
- Microwaving chocolate takes an average of 1 minute per ounce of chocolate.
- Never heat for more than 30 seconds at a time.
- Always stir the chocolate and scrape the sides and bottom of the bowl well, where it gets most of the heat, to prevent the outer edges from drying out and leaving crunchy bits in the chocolate.
- Always stop heating when the chocolate is 90-95% melted, and stir to finish the process.
- Unless you are intentionally and strategically melting the chocolate in milk or other liquid, make sure there is NO water in the bowl before adding the chocolate – even small amounts of liquid can ruin the melting process.
Related questions
How to dilute melted chocolate?
The best way to thin out melted chocolate is to add a fat to the mix.
Cocoa butter is an amazing option because it is an actual ingredient in chocolate and is almost all fat, so it creates a finer melted chocolate without diluting the flavor at all.
You can also use almost any type of oil, such as butter, coconut oil, or another neutral-tasting oil. Keep in mind that if you use olive or peanut oil, for example, it will change the flavor of your chocolate.
Why add oil to melted chocolate?
Oil, or any other type of fat, helps soften melted chocolate, also making it thinner and more suitable for dipping or coating.
Increasing the fat content of the chocolate helps keep it liquid for longer and also melts more evenly and consistently, creating a smoother texture. Adding oil, or any other type of liquid, dilutes the chocolate.
This is one of the reasons why so many people do it, but it can also negatively affect your recipe if you need a thick sauce, for example, so only add as much as you need.
You can also practice a few times to get the exact ratio for your needs.
What does it mean to temper chocolate?
Molten chocolate tends to become dull and brittle, losing the luster and shine of premium chocolate candies. Tempering is a process that consists of carefully melting the chocolate, cooling it, and reheating it, stirring constantly.
This helps recombine the fat gently into the liquid and restores the shine to the chocolate, along with a crunchy, crumbly texture.


