
How To Store Fried Chicken? - The Ultimate Guide
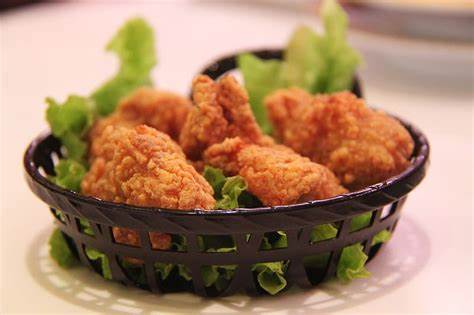
Fried chicken is a staple in many homes. It’s one of those meals that just screams home cooking for many of us. Whether you love fried chicken because you have precious childhood memories of your grandmother’s homemade fried chicken or you’ve just recently tried fried chicken, you know it’s delicious.
Fried chicken can take some time to prepare, so many people make it in large batches. But how do you store fried chicken after you’ve made it? Are there things you need to know to make sure it’s stored correctly? How do you use it after you have saved it?
All these questions are essential things that you should be aware of and know about. Therefore, it is very likely that you are here to consult this guide. We have all these answers for you.
In this guide, we’ll walk you through the process of storing your fried chicken from start to finish and even cover multiple storage options so you can determine which one you prefer. We will accompany you every step of the way.
Read on to learn everything you need to know about fried chicken, its storage, and more.
The Ultimate Guide to Fried Chicken
How do you prepare fried chicken? Do you use a beloved family recipe? Do you make your own breading? Do you bake it instead of frying it?
These may seem like silly questions, but the truth is that every little thing can make a difference in how you ultimately decide to keep your chicken. To give you an idea of what we are dealing with, here are several variations of fried chicken.
- Fried chicken in an electric fryer
- Chicken fried in oil/fat on the stove
- Air Fryer Fried Chicken (Gaming!)
- oven fried chicken
- Fried with various sauces
- Fried in the typical homemade breading
- Fried in a store-bought breading mix
- Fried in crushed chips, cereal, or breaded biscuits
As you can see, there are numerous factors that can affect your fried chicken making process, and each one of them could make a difference in the end. But guess what, the end result is still fried chicken.
That is the point we are trying to make. Regardless of the method you follow to get fried chicken, you can follow essentially the same guidelines when it comes to storing your fried chicken.
There are no very detailed steps that vary based on cooking media or types of breading, you can essentially use these tips and storage methods across the board. There’s no need to worry about getting it right just because you make fried chicken multiple ways!
fried chicken process
We have already said that there are numerous ways to make fried chicken. However, you should be aware of the basic elements that often go into the fried chicken process so that you understand how those ingredients could be affected later in storage.
To give you a basic idea, we are going to guide you in the preparation of everyday homemade fried chicken. Even if you make your fried chicken with variations on the recipe, chances are most of the elements we share here will remain the same.
- Most common fried chicken has a standard batter consisting of salt, pepper, seasonings to taste, and flour. Recipes may vary from this, remember this is just a general example.
- Most fried chicken recipes are made with chicken that isn’t frozen – defrost or defrost your chicken for best results.
- Beat the eggs.
- Dip the raw chicken into the eggs and cover.
- Next, transfer the egg-dipped chicken to your flour and seasoning mixture, turning the chicken over to coat well.
- Once the chicken is coated, move on to the way of frying that you have chosen.
- If you’re using the stovetop or an electric fryer, start by heating the fat or oil to about 375 degrees. Fry a few pieces at a time, usually 7-8 minutes on each side of the chicken.
- If you use the oven, line a pan with parchment paper for easy cleanup. Bake in the oven at 400 degrees for about 35 minutes, turning at least once halfway (but you can also turn at 7-minute intervals for even cooking).
- If you are frying the chicken in hot fat, you will need to place the finished product on a kitchen towel or paper towel to absorb some of the excess fat before serving.
It really is that simple. However, between the preparation and the actual frying process, it can be a bit messy and time consuming. If you’re going to make fried chicken, be prepared for all the responsibility that goes into it, from preparation to finished product and cleanup afterward.
How to prepare fried chicken for storage
There is more than one method to store fried chicken, but when it comes down to it, you will be doing it in the fridge or freezer. But you have to know the process and know how to prepare for that process.
It’s actually very simple. Chicken cannot be left at room temperature for a long time. In fact, it is recommended not to leave fried chicken at room temperature for more than 30-60 minutes.
Keep in mind that the fried chicken will take time to cool completely before reaching room temperature. You don’t have to worry about rushing to put it away immediately after cooking.
Your fried chicken needs to cool down before you try to prepare it for storage, so as not to spoil the integrity of the breading.
Here are the steps to prepare your fried chicken for storage. Use these tips regardless of the storage method you plan to use.
Whichever it is, though, you’re going to want an airtight glass tupperware, like this one from Amazon.
- Let the chicken cool to room temperature. This should be done in about 30 minutes from the end of the cooking time.
- There are several ways to wrap or prepare chicken for storage, listed below.
- Seal the chicken tightly.
- If you seal the chicken in a dish, use a shallow dish that doesn’t leave too much room on the plate when you close it for storage.
- Wrap each chicken piece individually in aluminum foil; heavy-duty aluminum foil is preferable. Or better yet, use reusable food wrap. I personally use these organic beeswax from Etee.
- Store the chicken in a freezer bag. If you use this method, it is still recommended that you wrap each chicken individually as well.
- Once the chicken has cooled and is wrapped and ready to put away, you can move on to putting it away.
refrigerate fried chicken
Once you’ve prepared the chicken for storage, you’re ready to determine how you want to store it. If you have prepared a large batch and plan to use what you have stored later for a full meal, you should plan to freeze the chicken.
If you know up front that you are going to freeze the chicken, you can skip to the section that deals specifically with freezing fried chicken and get down to your specific needs.
If what you are looking for is the best way to store leftovers for a few days, you are in the right place.
We hope you followed the recommendation to wrap it in aluminum foil or seal it in an airtight container. The idea behind this recommendation is to remove excess moisture from your storage, which will preserve the breading when you reheat it (or eat it cold).
Here are some basic steps for refrigerating fried chicken.
- Prepare the fried chicken for storage: When you refrigerate it, you can omit the freezer bag and store it in a shallow airtight container or wrap each piece in aluminum foil.
- Put the fried chicken in the fridge within 2 hours of finishing cooking it.
- Place the fried chicken in the refrigerator.
- Store fried chicken in the refrigerator for up to 5 days.
Later in this guide we’ll talk about reheating methods and how to serve fried chicken after storing.
It’s that simple! Preparing fried chicken for storage is half the battle, but if you follow these tips you shouldn’t have any problems.
Freeze Fried Chicken
Freezing fried chicken is the way to go if you’ve made a large batch of fried chicken with the intention of making multiple meals. And guess what, it’s a great way to prepare meals ahead of time.
Frying the chicken and then freezing it will work just fine. If you follow the recommended steps, you shouldn’t have any concerns that your breading will be affected or soggy.
You can freeze fried chicken and come back to delicious, crispy fried chicken. You just have to follow the steps indicated. After all, that’s what we’re here for, right?
Here are the steps to freeze fried chicken:
- Prepare your fried chicken for storage in the freezer, following the guidelines and tips shared above in “How to Prepare Fried Chicken for Storage.” Use a shallow airtight container or wrap individually in aluminum foil and place in a freezer bag.
- Prepare the fried chicken and place it in the freezer within about 2 hours of finishing cooking the chicken.
- Place fried chicken in freezer; it is recommended to store it at 0 degrees Fahrenheit.
- Keep fried chicken in the freezer for up to 12 months, if stored at 0 degrees. If it freezes at a lower temperature, use it within 6 months of freezing.
Once again, it’s really quite simple to store fried chicken. If you’re going to put the effort into making fried chicken, you should be willing to put the effort into storing your fried chicken properly. Trust me, your stomach and schedule will thank you later!
reheat fried chicken
Now that you know how to make fried chicken, how to prepare fried chicken for storage, and how to refrigerate and freeze fried chicken, let’s talk a little bit about how to use fried chicken after storage.
One additional idea: If you’ve refrigerated your fried chicken, you can always eat it cold right out of the fridge. You may be surprised to learn that this is one of the most popular ways to eat chicken from storage. However, we do not recommend it if you have frozen the chicken.
Here are some steps to reheat fried chicken after storing:
- If you’ve frozen your fried chicken, you’ll need to let the chicken thaw before heating it up. To thaw, you need to unwrap the chicken and let it thaw at room temperature.
- The best way to reheat fried chicken is in the microwave or oven. Refrying chicken can cause it to be over-flavored or slightly soggy.
- Microwave - Wrap individual fried chicken pieces in a paper towel and microwave in 30-second intervals. If it doesn’t get hot enough, flip it over and heat another 30 seconds.
- Wrapping the chicken loosely in a paper towel will help preserve the breading during the reheating process.
Oven: Put a layer of aluminum foil on a baking sheet. This will help keep the breading crisp. Arrange the fried chicken in a single layer on the foil. For best results, also cover the top of the pan with aluminum foil.
Heat it in the oven at 400 degrees for about 20 minutes.
You can use the method that works best for you. The best way to keep fried chicken crisp is to use the oven. However, we understand that an oven for reheating may not always be available.
Related questions
We hope you found this guide informative and that the information fully covers everything you need to know about storing fried chicken.
We have provided some common questions in a question and answer guide and invite you to review them for more information that may be useful to you.
How can you tell if your fried chicken has gone bad?
Chicken often has obvious telltale signs when it starts to go bad. If the chicken smells bad, it is most likely spoiled and should be disposed of and any exposed areas thoroughly cleaned to prevent cross contamination.
Also, you can tell that the chicken has gone bad by looking at it. If it has developed a slimy texture or the color looks odd, you should discard it immediately and clean the exposed areas.
How can I keep my breading from falling off when frying chicken?
Frying chicken often becomes an art. When you prepare chicken for frying, there are a few minor steps that can make a big difference.
If you soak the chicken in buttermilk before breading it, you want to dry it out enough that the buttermilk won’t drip when you batter it. When you roll the chicken through the flour mixture, you need to shake off the excess flour. Often it is this excess flour that causes the breading to fall off because it does not stick to the chicken.
Most Popular Posts


Hey There! I am Agnes a Fitness Fanatic, Mom of two Amazing Daughters and a Kitchen and Cooking Enthusiast. I love blogging about Kitchen Upgrades, Appliances, and Cooking Tips, and this Blog aims to help you make wiser choices when it comes to your kitchen. Feel free to contact me if you need help!!!!!!