
What Does an Air Fryer Smell Like? How Do You Get Rid of the Odour
When a new appliance is unwrapped from the box, it emits a pleasant aroma that everyone enjoys. However, there is another odor that can be bothersome at times. The burning plastic scent comes from new devices when they’re plugged in. Plastic components in kitchen appliances might emit an odd stench. These components are frequently made of chemicals that emit this stench when the appliance is first used.
In technical words, this means that the new appliance’s plastic components still contain volatile organic compounds on them. These components can eventually evaporate, leaving the appliance with an obnoxious plastic odor.
When air fryers are brand new, they emit the same odor. After a few uses, it fades away. If it persists, you’ll need to take some steps, which we’ll go over shortly. Before we get into it, let’s take a look at why your air fryer smells like plastic when it’s brand new.
Why does your new air fryer have a plastic odor?
From the outside shell to the majority of the inside components, air fryers are built of heat-resistant plastic. The heat-resistant plastic insulates the heat, keeping it inside the device while remaining calm on the exterior, preventing you from burning your skin when you contact it.
Some of these plastic components must vent plastic fumes over time as a result of the heating and cooling process. Most factories do not have the time to allow these components to breathe and release the plastic odor. As a result, air fryers smell like plastic for a few minutes after you use them.
Should you be concerned about the air fryer’s plastic odor?

Although the plastic scent can be bothersome, you won’t have to worry about it when the device is brand new. When you heat and cool your air fryer repeatedly, the volatile organic components ultimately evaporate, and the stench dissipates after 10-12 uses.
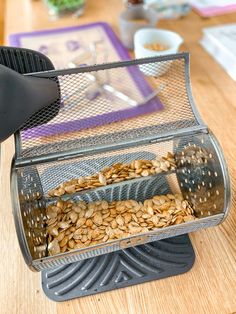
How Do You Get Rid Of Your Air Fryer’s Plastic Odor?
We’ve talked about why your new air fryer emits an obnoxious plastic stench. Let’s have a look at some of the probable solutions for eliminating this odor.
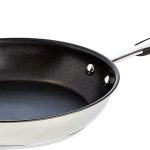
Clean the Grease Separator Tray as well as the basket-
The first step is to wash the new separator tray and basket thoroughly with a strong dishwashing soap that can easily remove grease.
Scrub the pieces well to remove any dirt, grease, or plastic particles.
We have no idea how the components were handled during the production and shipping processes; this is a critical step. Remove the grease from the basket and tray before allowing it to air dry.
Get Your Air Fryer Up and Running-
First, your new air fryer needs to go through a few “dry runs”! It is highly recommended that you operate your air fryer without food for a couple of minutes to allow the plastic particles on the inside and exterior of the air fryer to heat and then cool down, releasing the plastic fumes.
Place the clean air fryer basket and separator tray inside and preheat the air fryer to 350-400 degrees with no food in it.
Allow for at least 40 minutes of running time, followed by 15 minutes of cooling time. Rep this process 3-4 times more. It will assist the vapors in dissipating. The plastic odor will soon dissipate; because the scent may be too much for your kitchen, you should do this outside with access to an electric outlet or in a garage.
Season the Basket As Well As the Grease Separator Tray-
Coat the gasket separator tray and basket in a thin layer of cooking oil after you’ve completed the previous two stages. Any spray cooking oil should be avoided because it may cause the anti-stick coating on specific components to peel away.
To coat the inside of the grease separator tray and the air fryer basket, dampen a paper towel with ordinary cooking oil.
Would you please place them in the air fryer and cook for 10 minutes at 350-400°F?
Remove the tray and basket after allowing 10 minutes for cooling. You have one more opportunity to redo the process.
After you’ve finished, clean the pieces with dish soap to remove any remaining oil. Remove them from the dryer and let them air dry once more.
Lime Juice & Distilled Vinegar

- If you can still detect the odor of plastic, you should try this simple approach. Combine one tablespoon lime juice and one tablespoon distilled vinegar in a small oven-safe dish. Combine all of the ingredients and place the dish in the air fryer basket. Preheat the fryer to 350-400 degrees Fahrenheit and cook for 3 minutes. Allow 15 minutes for the dish to cool within. Any fumes remaining inside will be absorbed by the lime and vinegar mixture.
- After this steam bath, give the basket another wash. Wipe the inside of the air fryer with a wet towel to remove any remaining plastic odors and residue.
- Your new air fryer will no longer smell like plastic after following all of the steps. Everything will be ready for you to prepare delectable meals.
- Here are a few pointers on how to use your air fryer correctly:
- Following each cooking session, wash your basket. It will prevent grease buildup and bacterial growth, both of which can contaminate food and cause infections.
- After each cooking session, wipe the interior of your air fryer with a moist towel.
- Once a month, give the air fryer a vinegar-lime steam bath to avoid odors and keep it in good working order.
- The plastic smell usually fades away after a few uses with your air fryer and following the methods above. If your air fryer continues to emit a noxious odor, there may be another cause.
Other Causes of Bad Smell in Your Air Fryer-
- If your air fryer emits any other odor than the delicious meal you’re cooking, you should be concerned.
- Don’t be alarmed if it emits a white smoke with a faint odor; this is usually when cooking fatty meals.
- If your air fryer emits a robust burning plastic or chemical stench, as well as black or blue smoke, it could be a sign that it has a significant problem. It’s possible that you mistakenly put a non-oven safe plastic component inside your air fryer, which is causing the smoke.
- If your warranty allows, you should turn off your air fryer and submit it for maintenance or swap it.
What should you do if food gets trapped on the heating element?
In most air fryer designs, the heating element is visible.
Allowing food to stick to it or around it while cooking may cause it to burn, resulting in an unpleasant odor and smoke. As a result, your air fryer’s heating element must be cleaned on a regular basis.
Bonus Suggestions for You!
- Use a heavy-duty aluminum foil to cover the bottom of the basket to extend the life of the anti-stick coating on the basket of your air fryer. It catches any excess fat, melted cheese, or anything else that spills from your dish. Make a little tray with handles extending out the sides using aluminum foil. You’ll be able to effortlessly pick it up and keep your air fryer clean and clutter-free.
- We have a suggestion for you whether you prefer crispy fries, a nicely cooked steak, or a chicken breast. Preheat your air fryer to the desired temperature and cook for 5 minutes. Replace the food in the basket after the first run. The insides of the air fryer will be pretty hot, so use caution. The hot sir will seal the fluid inside your chicken, fish, or steak, making them tastier. It also cuts down on time it takes to cook, saving you time.
- Your new air fryer is a healthy alternative that not only produces a wide range of delicious foods but is also highly practical due to its compact size and portability.
- You can eat everything from crunchy oil-free fries to healthful chicken wings to scrumptious muffins and brownies.
- With all of these incredible features, all you have to do now is maintain your air fryer from the beginning, and it will last a long time.
- Do not be alarmed by the plastic odor emanating from your new equipment.
- Use it a few times and follow the steps we’ve outlined to solve the issue.
- Clean it on a regular basis and keep an eye out for any strange smoke or scents.
- Have fun in the kitchen!
Most Popular Posts


Hey There! I am Agnes a Fitness Fanatic, Mom of two Amazing Daughters and a Kitchen and Cooking Enthusiast. I love blogging about Kitchen Upgrades, Appliances, and Cooking Tips, and this Blog aims to help you make wiser choices when it comes to your kitchen. Feel free to contact me if you need help!!!!!!